Wednesday, January 31, 2007

Quick five sided box

I just felt that I've got the needle punch machine, I've tried it out and now I need to make something! This quick box is made in just two main pieces; 1 the top and sides and 2, the base.


(click on photo for bigger image)

You make a pattern like a row of equal sized 'beach huts' for the main part, and a pentagon with equal sides that measure the same as the bottom of a single 'beach hut'.

The box is made from a 'sandwich of top fabric, craft or pelmet vilene and felt.

I used a piece of hand dyed muslin for the top fabric and stitched all over it in a grid pattern to hold the layers together. The decorative 'tiles' were made on the embellisher and are patches of silk fabric overlayed onto dark green flannel. I bonded all the layers together to make it easier and that was a mistake on two counts: first, it makes it very stiff and quite difficult to work and secondly you lose the quilted look that you get when you machine onto felt. I managed to needle punch the tiles onto the thick fabric sandwich, (that machine has certainly got some punch!) but I wouldn't try to do it again because the machine did get a bit hot.
(click on photo for bigger image)
I straight stitched over the tiles in a spiral pattern to harmonise them a bit more with the main fabric and edged them with a machine wrapped cord. Then I edged the whole piece by machine zigzaging on some of the same cord around the edges and attached the base with ladder stitch. I wasn't really happy with what I had done, so I buttonholed all around the edges - much better!
Then I added cords with beads and a buttonholed curtain ring for the closure and stitched some pearly buttons onto the top tiles and Hey Presto! This is quite a quick method. It took me longer than it should have done because there was a lot of experimenting with the needle felted tiles and the buttonhole stitching took a while because the fabric was so stiff. If I used this method again I would put a piece of thin card in the base, because the vilene isn't firm enough.
I still prefer the 'old fashioned, traditional' method of covering and lining individual pieces of thick card and then ladder stitching them together but this is a quick, simple method with a minimum of hand stitching and no thick card to cut. There are very clear, easy to follow instructions and lots of good ideas for using this method in this book:

Sunday, January 28, 2007

Needle punching

I've been playing with the embellisher. First I made these:


I used some rejected bits of painted fabric - I'll never be able to throw anything away again!

Then I made these:


I was pleased with these ones. I think I am beginning to get the hang of it and I'm finding out which fabrics mix together and those that don't. The ground fabric is dyed and boiled blanket that didn't felt as well as I had hoped. I found that silk felts into it beautifully. The spotty stuff on the pink piece is a nappy liner marbled with oil paint. I found that if you want the applied fabric to blend in, you need to needle punch from the back as well. On the top surface you get a very textured look, like heavy FME. On the bottom you get a fluffy, felted look.

I have lots of little bits to practice TAST stitches on now - having to resist the temptation to stitch on them right away.

Saturday, January 20, 2007

A new bit of kit

I've bought myself an EMBELLISHER for a late Christmas present. I bought it here:
for details, see under the "household sewing machines" section.
I am really very pleased with it. It is a very basic model, encased in a modified sewing machine body. Not as pretty as the Babylock or Janome but I figure it's not a sewing machine, so it doesn't matter. The one critisicm I would have is there is no light switch - the machine is on, the light is on and I am quite sensitive to flicker. It is an eight needle punch machine and uses individual needles, so you can replace a broken one, or take some out to suit your project (I haven't tried this yet). There are no frills, no instruction manual, no project book but in the accessory are allen keys for the needles, a brush for cleaning, a small pair of pliers for holding and straightening needles and best of all, some spare grub screws for the needle head (I have lost so many of those from the light covers of sewing machines). Although there is no instruction manual, the distributors have issued an instruction sheet. One thing that isn't made clear is that the presser foot lever is only engaged when the foot pressure is at the factory setting, and that is a very small adjustment. I was confused by this at first, and a little worried, but I soon found I preferred to manually adjust the pressure, and once you get into the swing of it, as for fme, you don't need to use the foot at all! Delivery was excellent, I ordered the machine on Tuesday and I was using it Thursday afternoon. For the price - I reckon its an excellent buy

Here's what I've done with it so far:


Torn strips of muslin (calico, scrim), some dyed some plain, roughly stitched together. Wool tops (roving) laid on top, then worked over with the embellisher. The muslin makes a loopy effect, rather like cable fme stitch. (I also did a piece of this muslin with hot water dissolvable as a stabiliser and silk tops on the surface, see later in this post.)
Cotton and silk cocoon waste, with cold water soluble as a stabiliser. Washed out and dried. This is like cotton/silk paper. Because it was made with waste, there are some seeds and husks.
Cotton and silk cocoon waste neeedle felted on the embellisher without any stabiliser. Worked fine. The embellisher makes a highly textured surface on the top side, and a felty, fluffy surface underneath. I exploited this by turning the piece over and embellishing lines to make a striped pattern on the textured top.
Finally, I used some more muslin strips. I embellished the strips onto a piece of hot water soluble fabric with some natural silk tops. Poured boiling water over, rinsed and dried out. Then I added some small scraps of silk. The effect of needling the silk looks just like dense fme. I added a scrap of unravelled silk yarn. Then I tested the machine by needling the whole thing to a piece of craft vilene (pellon). No trouble at all. Final touch was to burn off stray ends at the edges in a candle flame. And there it is, my first fibre postcard made on the embellisher!
(Click on photos for bigger image)

Wednesday, January 10, 2007

Joggling Along - More Lesson 6

I think this is about done, probably I have already overcooked it!


(Click on photo for bigger image)

Monday, January 08, 2007

Joggling Along - More Lesson 6

The scrim has been applied to the background and some of the top background layer has been cut away. More texture has been added to the flower heads and I have started to fill in the background.


The stitching is much finer than I had intended, so it is taking longer than I had allowed for.

Here's a closeup:


(click on photos for bigger image)

Thursday, January 04, 2007

Joggling Along - Lesson 6

At last, I have started the final lesson for Creating a Personal Library of Stitches.

The inspiration was:


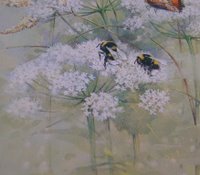
Left, a quick sketch of summer Hogweed - and Right, a painting of cow parsley from a book.


First, simplified and interpreted in contemporary blackwork.


For the background, a piece of silk 'bubble printed' in ink, then covered in a piece of transparent lightly coloured space dyed silk to soften the effect.


Pulled stitches on scrim using stranded cotton and crochet cotton, being applied to the background. The areas around the stitching will be cut away.


I had intended to make this very encrusted and textured, but after I had done the pulled stitches I liked the lacy effect so I may not. It depends on how it looks after I have cut away the surplus scrim.

I just have to finish this, then its onwards and upwards to Take a Stitch Tuesday!

(Click on photos for bigger image)