Monday, October 30, 2006
Happy Halloween
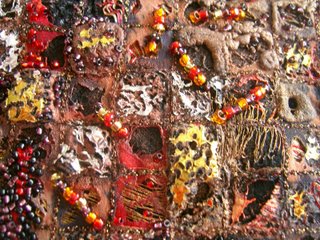
Silk paint and gutta resist on cream silk, applied to black velvet with free machine straight stitch.
Tuesday, October 24, 2006
Bad postcard! 0r how to make a mess without even trying
In the interests of genuine blogging, in this case not just showing the stuff I am pleased with, here is a genuine failure:
This is what I did with the reject piece from making the 'hot' postcard. The theme is still hot, but the result is a mess! I can't imagine what I would use this for.....
(Click on photos for bigger image)
I'll keep it in the drawer and possibly it will get incorporated into another piece some time.
For discussion on 'A Genuine Voice Online' go to:
http://inaminuteago.com/blog/index.php/archives/2006/08/08/what-is-a-genuine-voice-online/
Monday, October 23, 2006
Post As You Go Paisley
A little more progress on the paisley panel:
Not sure about that wide grey stripe. Originally I filled in the whole motif, but when I stood back to look at it, it was far too heavy. I was loth to unpick ALL that hard work, so I have left a stripe. I'll keep it there for now and maybe when I have filled in some more motifs it will balance out.
Here's the closeup:
(click on photos for bigger image)
Wednesday, October 18, 2006
Textile Tuesday - Black
Thought I'd have a go at Textile Tuesday! Its NEARLY black.
This is a layered sample. The background is black velvet, backed with s a slightly smaller piece of craft vilene (pellon). Fabrics used are polyester scraps (coloured with Markal (Shiva) paint sticks) along with scraps of net, lurex and metallic fabrics. The fibres are wool tops (roving) and the threads are metallics and lurex ribbon. Techniques are free machine embroidery in metallic threads and beading. It represents a dead hydrangea flowerhead.
Here's the closeup:
(click on photos for bigger image)
Wednesday, October 11, 2006
Recycling the rejects
Just for something completely different, I got out one of the rejected pieces for my July "HOT" postcard and attacked it.
The original is here:
http://photos1.blogger.com/blogger/4568/1104/1600/postcard%2016.jpg
This is what I have done so far:
(Click on photo for bigger image)
I rubbed over the expanda-paint with metallic paintsticks (Markal, Shiva), cured it for 2 days then heat fixed it. I was disappointed with the result, not shiny enough. I applied some gold and silver plastic foil with the soldering iron. It fixed really well onto the expanda-paint and made a nice texture but the smell was awful! Unfortunately, the camera didn't catch the gleam of the foil very well, but you get the idea. This foil is meant for writing on cards, scrapbooks, etc and came with a battery operated hot pen. The pen didn't work - I shouldn't have been surprised really because I got it in the £1 shop - I wondered why it was so cheap - now I have the remains of 6 sheets of very expensive plastic foil!!
Anyway, enough of this. Now to open the bead box and embellish my creation.........
Monday, October 09, 2006
Post As You Go Paisley - a little progress
I haven't really done much of this, but I said I'd post as I go, so this is the little I've managed to do:
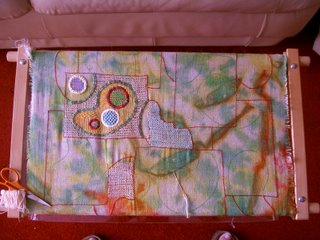
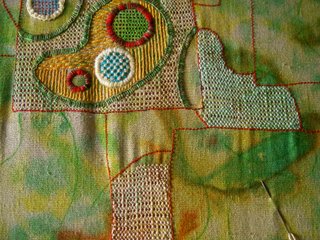
I put it into a roller frame, because I wanted to be able to see more of it as I stitched, to be better able to gauge the effect I was having. But...... it has made it more difficult to do the pulled work because the 'reach' is longer, and because the work has to be turned at the end of each row, to go back along, its not feasible to fit it in the stand. I have machine stitched the work to the tapes, so I will put up with it this time - another time I will know better! The colours in this shot are not true, the colours in the close-up are much better. The plan is to stitch all the paisley motifs outside of the squares in pulled work - currently foursided stitch, and heavily pattern all the paisley motifs inside the squares.
When I come to fill in the paisley motifs in the squares, I will be able to put it on the stand and work should go much faster and more comfortably. I've got some silk dyed crochet cotton hanging up to dry in the greenhouse, I'm hoping that the sun will come out today and 'fix' it.
This piece is about A2 paper size.
I started this because I felt like doing some 'traditional' hand stitching, albeit in a slightly 'different' way. Now I'm beginning to wonder............................................ could be a long job - I'll have to be careful it doesn't become a UFO.
(click on photos for bigger image)
Subscribe to:
Posts (Atom)