Wednesday, October 26, 2005

Witch face closeup

I've tried to take a better picture of the embroidered witch face for Connie. Here she is in profile. This is about the best I can do with my camera.

(Click on photo for bigger image)


The idea for the split stitch technique came from this doing this sample:


followed by this one:


Because the witch was so small, I couldn't pad the features, so I drew two profiles, embroidered them and stitched them together. I tried to get an impression of relief for the sunken cheeks by using a darker colour.

The face for Doris was a scan of the embroidered witch face profile enlarged, mirror imaged to make two sides for the face and printed onto printer transfer paper.


I added stitched outlines, buttonhole lips, bead teeth and various warts, then stitched the two profiles together.

Monday, October 24, 2005

The witch I made before Doris.

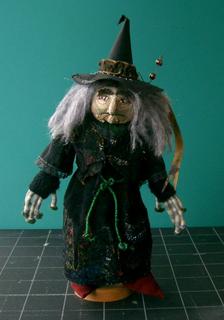
Before I made Doris, I made a much smaller witch. I was playing around with tassels and I wondered if I could make a doll using just a wrapped tassel. This is the doll I made. She was made from a hank of knitting yarn. All her clothes come off. She is able to stand on her own on a flat surface, because she is so small and her legs are so tightly wrapped and she has cardboard soles in her boots. Here she is propped up for her photo-session.


This is how I made her:
Dolls made from wrapped tassels.
Wrapped tassel .
Clothes.
Here's how I made her face.

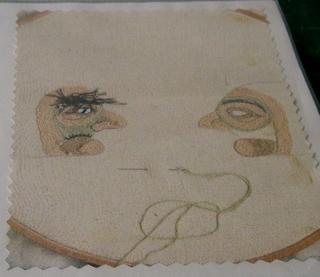
I drew the outline of the features and then traced it, plus a mirror image, on to calico. I embroidered it in split stitch in crewel wool and added warts and eyebrows.
Then I cut out the two faces with a seam allowance and stitched them together down the front and around the chin, hemmed in the rest of the seam allowance and stitched to the tassell head and added a wool wig.
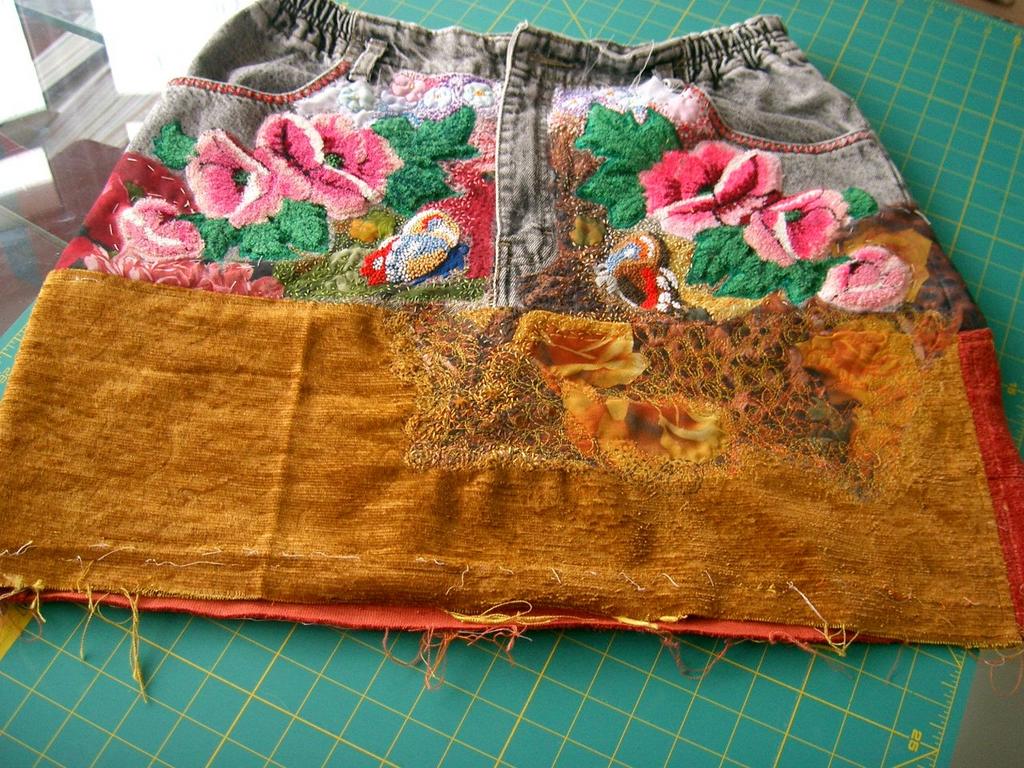
Here's how I made the clothes.


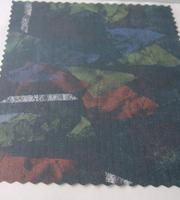
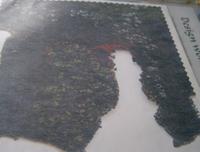
On the left, scraps of fabric applied to fine black muslin. On the right fabric heavily free machined with additional hand stitching. Burnt in a candle flame. I made two pieces of this fabric. (Sorry for the poor
quality, photo of a scan, but I hope you get the idea).

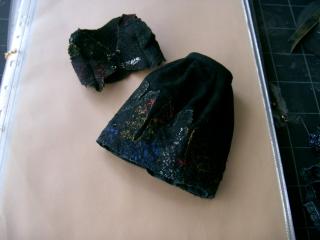
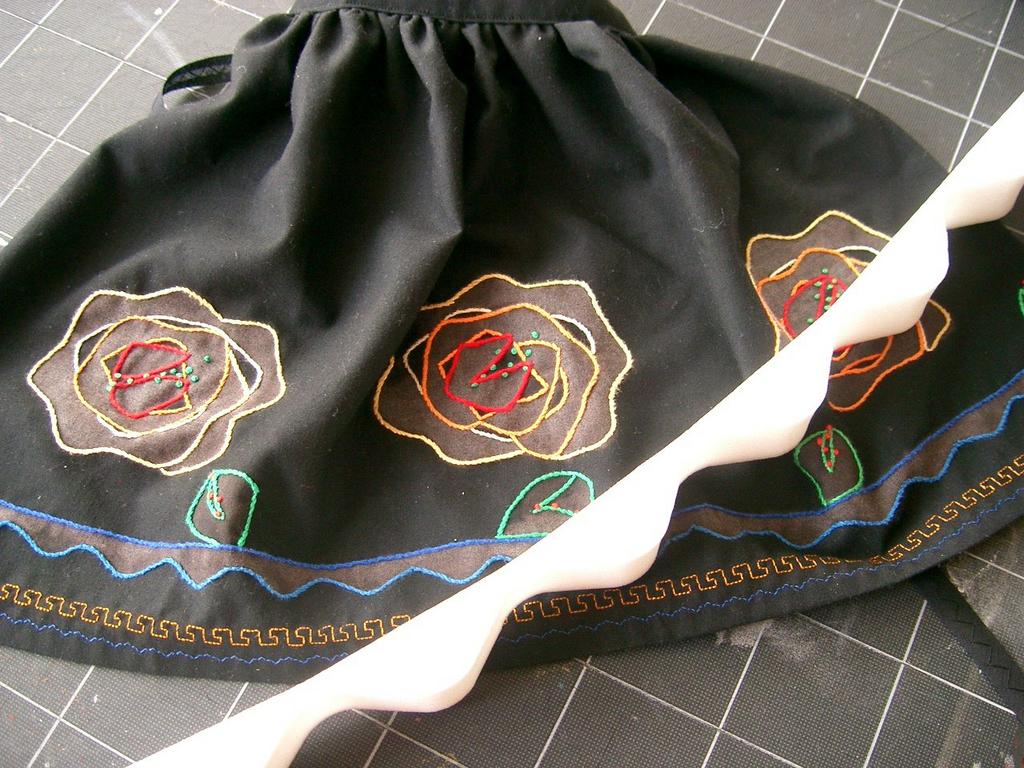
I used one piece of the fabric to make the vest, adding 'eyes' and a ribbon for lacing. I used the other to decorate the bottom of the velvet skirt.


Here's the witch wearing her chemise and wig.

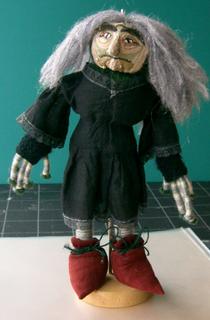
The wig is just a bundle of fluffy yarn. The chemise is made from black muslin with dyed nylon lace trim, has a gathered skirt and fastens at the back with press studs. The boots are made from stretch velvet and are just a simple darted sock with pointed toes. I put a cardboard insole in each boot and they gather up round the top with a 'lace'.


I made this doll in response to an assignment set by our City & Guilds tutor to design and make an item on the theme of 'Flight'. A witch was one of the 'flying things' I thought of and it was coming up to halloween!

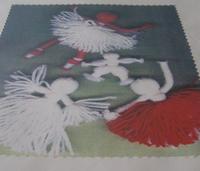
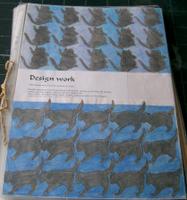
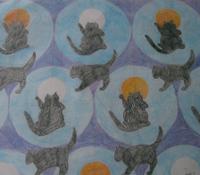
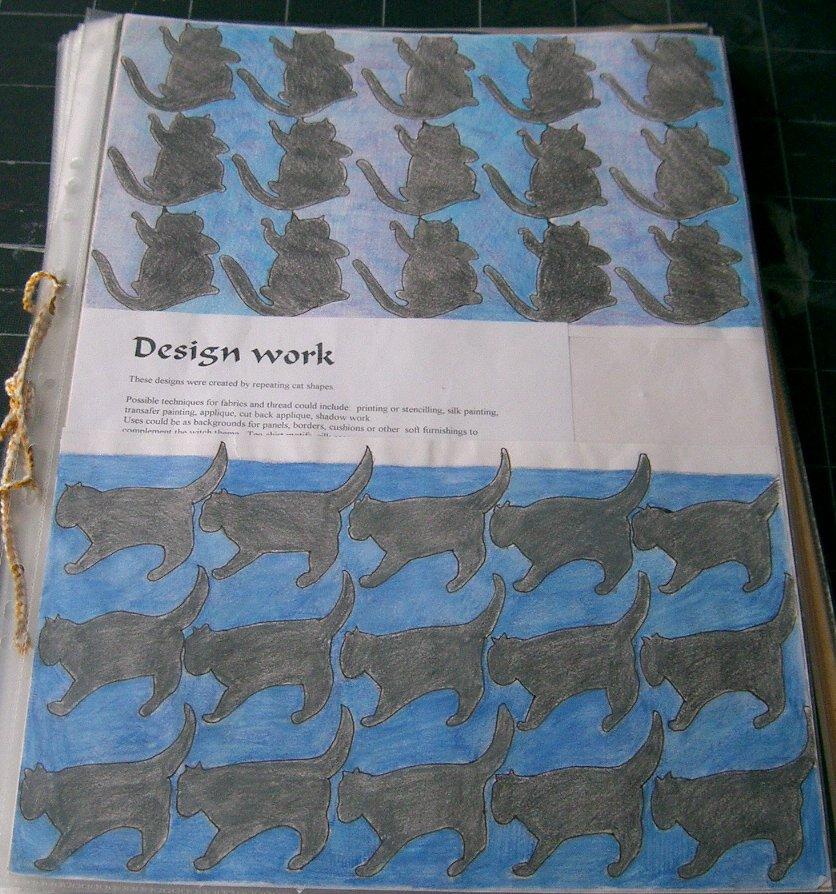
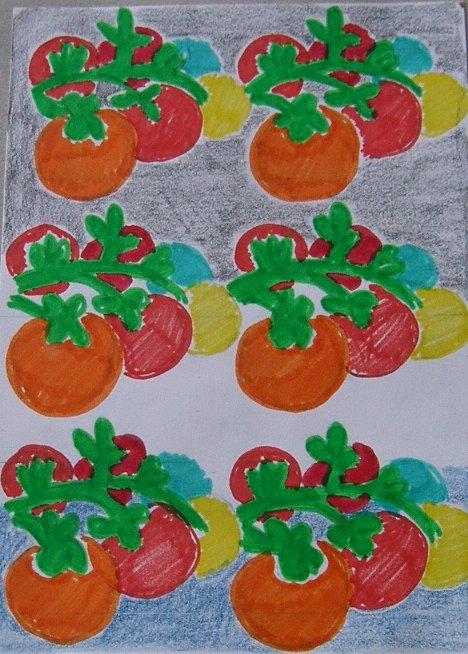
As part of the design work, I made these sketches of repeat patterns using the outline of a cat, the witches most usual familiar.

(Click on photos for bigger image)

Thursday, October 20, 2005

Tie One On - multimedia

This month's challenge for Tie One On is to use some kind of multimedia on an apron. I have used discharge printing, hand and machine embroidery.

I have enough aprons for the present, so I made this one for Doris. (May 2005 archive).

(Click on photos for bigger image.)


The design was discharge printed using ordinary household bleach. The printing block was the piece of polystyrene shown in the photo. Usually it is used to fill in the gaps in the edges of wavy plastic greenhouse roofs. I curled it round and tied it with string to make the flower motifs. They are a larger version of the motifs on Doris's skirt. I outlined the design in stem stitch in stranded cotton, then added some decorative machine stitching.

Here's Doris modelling the apron.

I think it makes her look quite 'folksy'.

Wednesday, October 12, 2005

Bags and bags of fun

Here it is, the incredible expanding bag!

(Click on photos for bigger image)


I have added a section of furnishing fabric to the bottom to give it more depth.
Now I want to blend it in with the rest. Of course, that means more stitching. To speed things up, I have done some free machining to add texture, before the handstitching. More bits of chiffon to add. I have a kind 'carpet bag' feel going here now. Odd how these things evolve! I want to be able to use the front pockets easily, so I think I am going to leave them unadorned, for contrast and to make a feature of some of the original denim.

'Thar she grows'
Here is the back, with the flowers filled in and some of the chiffon overlapped from the front, ready for hand stitching.


It looks a bit of a mess at the moment. I plan to 'box' the bottom after I have sewn up the seam, so that will take up quite a lot of the depth. Loads more to do, have to get a move on!!!

Tuesday, October 11, 2005

Disasters - a serious post

I've been sitting watching harrowing TV footage of the earthquake in India and Pakistan. A whole generation of children has been wiped out because the schools collapsed on top of them. And the situation is just getting worse as the rains come.

I am always affected by these natural disasters, but this one - all those children - has had me in tears.

Sketchbook - tomatos

Connie at The Scoop Score and Deal posts really excellent nature/wildlife sketches and photos.

http://thescoopscoreanddeal.blogspot.com/


The latest one is Jersey tomatos and it reminded me of some pages in my own sketchbook. This is from an exercise done during the design studies certificate for City & Guilds Creative Embroidery and was about different coloured pencil techniques. The bunch of vine tomatos was done in pastel pencil.

(Click on photos for bigger image)


The scrappy piece of paper at the bottom of page 1 has these explanatory notes.

1. graphite pencil and coloured pencil, overlaid colour.
2. contour drawing, coloured pencil.
3. contour drawing, coloured pencil and coloured paper.
4. coloured pencil, overlaid colour, burnished.
5. overlaid colour, pastel pencils, dark coloured paper.
6. stippling, pastel pencils, dark coloured paper.
7. hatching, coloured pencils.
8. scraffito, coloured pencils.
9. graduated shading, coloured pencil.

Here are a couple of ideas for repeat patterns. The first for a border, the other for a print.


Lots more mileage in these tomatos, thanks Connie for the reminder!

Monday, October 03, 2005

Tie one on - tea towels

Here are my bits for Tie One On, make an apron using purchased tea towels. I went browsing in our local warehouse while I was waiting for my puncture to be repaired and found these, one large one small, almost matching set. The small one will make the pocket. Just need some brown webbing for the ties!


And here's the apron.


(Click on photo for bigger image)

Month of Softies - September


(Click on photo for bigger image)

September's Month of Softies was to challenge yourself to try something new or difficult or unusual. I decided to use some wool tops I've had in the cupboard for years to make felt. I made these felt fish. I layered the wool and wrapped it around a washing liquid ball. Then I put it in the cut off leg of a pair of old tights and tied it tight. For one of the fish, I put small pieces of fabric in the felt layers. Then I put them all through a hot wash cycle in the machine, and left them to dry. I made a cut where I wanted the mouth to be and eased out the plastic balls. I buttonhole stitched around the slashed mouths and sewed on different sized buttons to make the eyes. The fins and tails are tassels in toning knitting yarns.