Thursday, June 30, 2005

WIP - Still on the carpet!

Still working on the designs from that carpet pattern. And still using up the dishcloths.


On the left, view of reverse applique using pink and blue dishcloths and a piece of bright yellow plastic tablecloth. Embellished with scraps of dishcloth and dyed wool blanket, hand stitching, beads and buttons.


On the right, closeup view.


Click on pictures for bigger image.

STOP PRESS - Oh no!

Have just had an email to say I've got my old job back. Last year I used to work in a call centre, and at the end of August they will move into premises at the end of my road. Two minutes away, but I can't see it from my house, what could be more convenient? They would like me back 1 month before the move, so I have one more month of freedom - better make the most of it!

Its not the usual run of the mill call centre. They provide cds, dvds, games etc. Most of the staff are young and interested in music or computer games, or students taking time out, with just a few old'uns like me to keep the balance. And best of all, I can wear what I like and I have to admit, it was fun! Just as well, because I can't see the 'boss indoors' letting me sit around here blogging when there's someone out there willing to pay him for my time!! HAH!

Wednesday, June 29, 2005

WIP - Back on the carpet


Applique. Click on photo for larger image. Posted by Hello

Still exploring the carpet pattern. (Archives 2005-06-12).

This is essentially a reverse applique. The two middle layers are a piece of shot pink/gold taffeta and a piece of hand dyed muslin from the 'what am I going to do with this its horrible' box. The top and bottom layers are brightly coloured synthetic dishcloths I bought from the Pound Shop - I thought they would make a cheap substitute for felt. They never got to the kitchen!

I stitched through all the layers with straight stitch on the sewing machine, cut back, then added some pink lurex thread for a bit of sparkle. Then I cut away the bits I didn't want from around the edge with a soldering iron.

Close up. Click on photo for bigger image. Posted by Hello

Sunday, June 26, 2005

One tied on


apron. Click on photo for bigger image. Posted by Hello

Here's a picture of me posing in the apron I made for the first 'Tie One On'. The theme is 'Home on the Range'. I planned to do simple zigzag applique on the sewing machine, but there it was, looking rather plain, just crying out to be embellished. And, as usual, I got carried away.............................

Here's a closer view. Click on photo etc. etc. Posted by Hello

I didn't use a pattern for this apron. (I didn't HAVE a pattern!). Its made from a rectangle of canvas. I put in two 'princess seams' to give it a bit of shape and cut the top corners off to make the 'bib'. The pocket is two pieces of Laura Ashley fabric circa 1980. The appliques are also Laura Ashley fabrics, except for the yo-yos (here we call them Suffolk puffs). I zigzagged them on first, then embellished with mostly buttonhole stitch in stranded cotton. I have to admit, I didn't plan properly and by the time I had decided to put the appliques on, I had already stitched the bottom edge of the pocket to the apron, so it got really fiddly. As my gran used to say 'my head will never save my legs'.

The little house. Click on photo, etc. etc. Posted by Hello

And here's Sunbonnet Sue. Posted by Hello

Gina, bullion roses!

Friday, June 24, 2005

Dragonflies


dragonfly Posted by Hello

Liz, over at Dreaming Spirals: www.dreamingspirals.blogspot.com/ has been posting some design work on dragonflies, culminating in a super bead box. Liz, did you know they can fly at 40 miles per hour and one of their old names was 'devils darning needle' because country folk thought they would fly right in your ear?!

I was prompted to get out my own dragonfly effort.

This is handmade felt - silk tops for the wings and dyed merino for the rest, except for the blue which is a silk and linen mix. Details are outlined with free ME and running stitch is added for the 'landscape' details.

closeup. Click on photo for bigger image. Posted by Hello

Arlee over at Albedo Design posted a lovely dragonfly curtain a while ago:

http://arleebarr.squarespace.com/designjournal/

Its on the second page of her June archives.

I bet there's lots more out there.

Tuesday, June 21, 2005


my patchwork. Posted by Hello

I started a patchwork bedspread this weekend. I wouldn't call it a quilt because it has no wadding and I have backed it with an old duvet cover, so it is three thin layers of fabric. Its a simple strip pieced design done on the sewing machine. I 'sashed' it with bias binding to cover my uneven seams.

I wanted to make a bedspread for the summer, because even a 'summer weight' duvet is too much on hot nights, but very early mornings can be quite chilly.

quilting. Posted by Hello

I'm quilting the three layers together with running stitch using crochet cotton and cotton perle. The plan is to stitch it very heavily, so that the whole piece handles like one fabric. I like the stitching on the spots and stripes - I think I will be exploring this a bit more (putting it in the 'ideas' box!).

closeup of the running stitches. Click on photo for bigger image. Posted by Hello

So far, I've just stitched a few rows on most of the squares to hold it together so I can take out the pins and finish the quilting while I sit on the sofa!

I've also just started on my apron for 'Tie One On'. Check out Tie One On at Angry Chicken on:

http://angrychicken.typepad.com/tieoneon/

No pictures yet, the boss has taken the camera to work with him. Should be finished by the time I get it back.

Saturday, June 18, 2005

Amazing pavement ART


World's biggest fly spray. Posted by Hello

I just had to share this picture of Julian Beever's work. This is a picture drawn on a pavement in chalk. Obviously, the fly caught my eye. Check out his work on http://users.skynet.be/J.Beever/fly.htm. It is truly amazing.

Thursday, June 16, 2005

Is it ART?


The collector Posted by Hello

A question arose about art quilts and can crazy quilts be art. I don't do art quilts or crazy quilts but I do a lot of needlework that I design myself. So, am I an artist or a crafter? I wouldn't call myself an artist, but I don't think I'm a crafter either. I don't have a message to convey, I just do it for fun, or to see if I can. Maybe if I wanted to get someone to pay me for it, I might take it a bit more seriously and then I might call myself an artist!

Anyway. All this reminded me of the City & Guilds course. For Part II we looked at Surrealism - we attended a Lee Miller (photographer) exhibition and looked at other artists, including Joseph Cornell who put things into boxes and was an obsessive collector.

The essence of all this, I thought, was to do something odd with an everyday object, convey some kind of message and, in the case of Jospeh Cornell, make an 'assemblage' (I suppose we might make a 'memory box' today).

This was all completely at odds with the way I view the things that I make - purely for enjoyment, but as ever I was prepared to have a go.

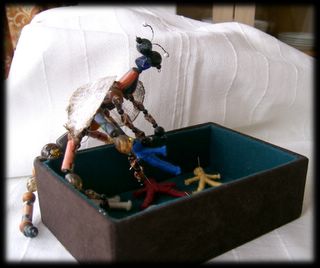
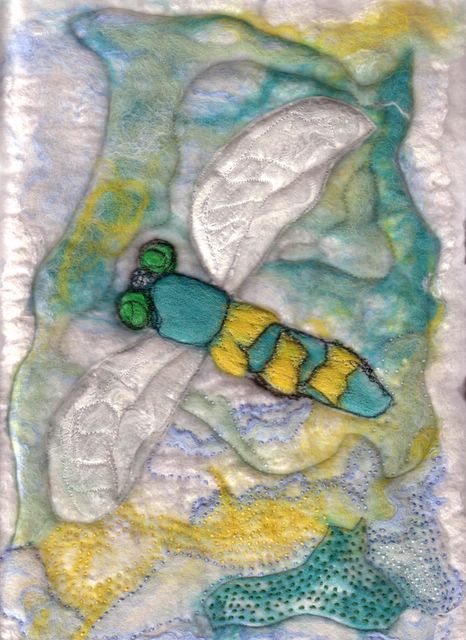
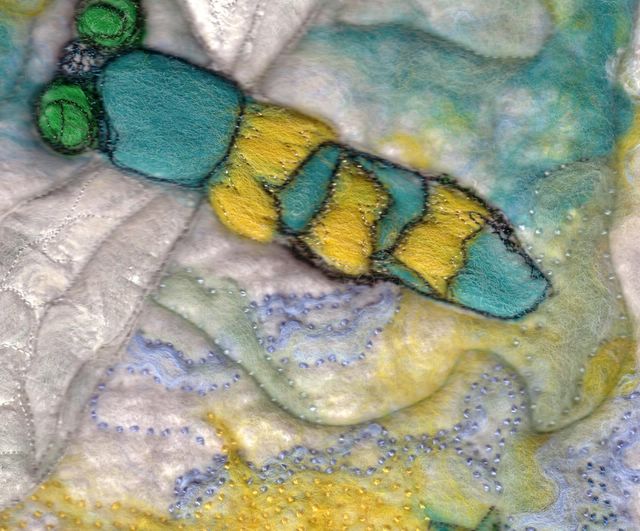
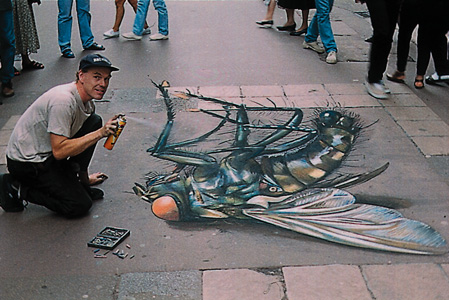
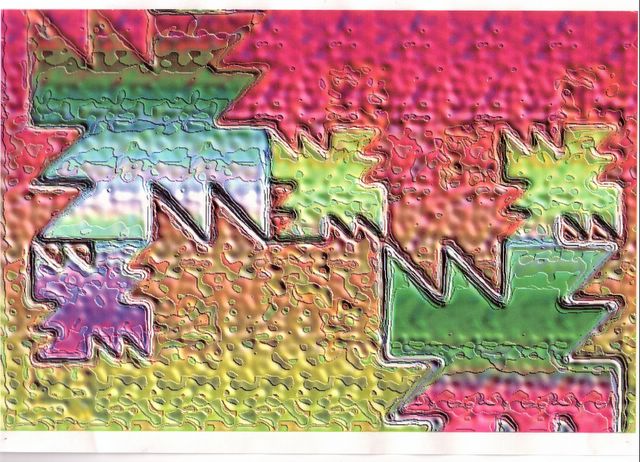
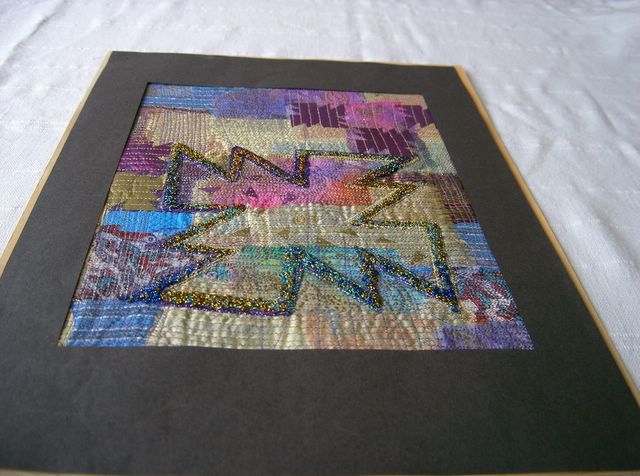
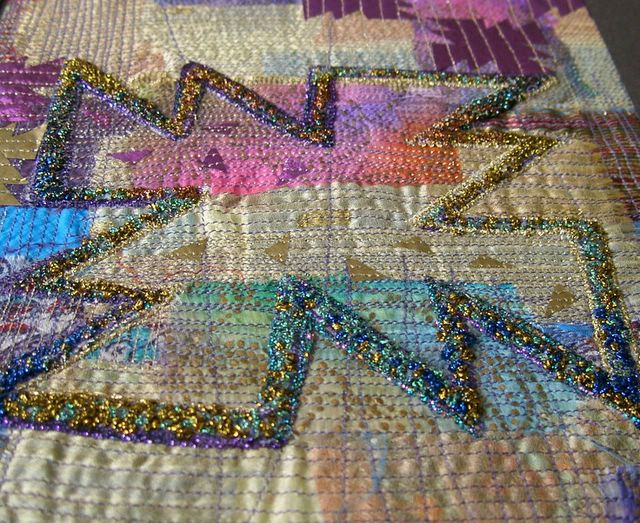
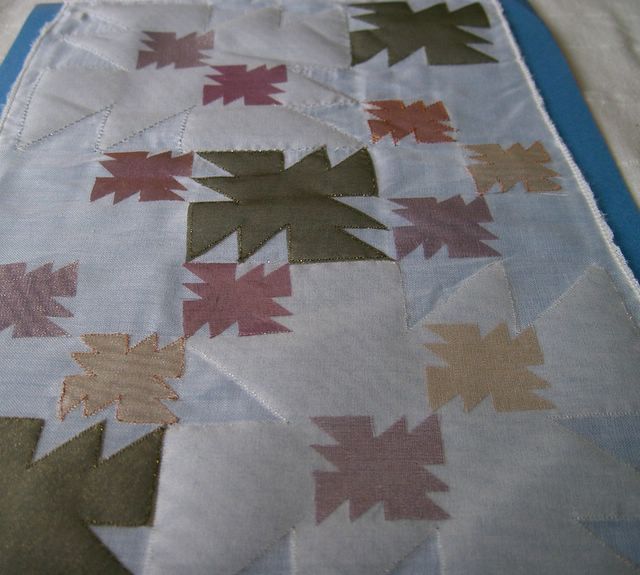
So, here is my 'Collector' an insect - and in his box, little people of slightly differing colour. My inspiration, apart from the surrealists, came from the seaside. At the old town hall in Aldburgh on the Suffolk coast is a room full of wide shallow drawers. Each drawer is full of moths and butterflies. I went there just after we had looked at Cornell, when the idea of collections was fresh in my mind.

When I showed this in class, one or two people were offended. I hope I haven't offended anyone here. It was a lighthearted joke at the expense of the surrealists and our very serious tutor.

close up. Click on photo for bigger image. Posted by Hello

The collector's body is made from odds and ends of beads and bits of wire; his wings from a fragment of sheer sari silk. His little people are just wrapped wool tassels. He sits on the edge of his box, adding his latest acquisition to his collection. This is his prize, the blue colour and the gold crown show that he has at last managed to find a specimen of royal blood.

So, is this ART or WHAT?

WIP carpet pattern


A line drawing of the carpet pattern was scanned into the Paint Shop Pro program on the computer. Then it was coloured in, various effects added and printed out ready to use for inspiration. Posted by Hello

sample based on Paint Shop Pro print. Posted by Hello

Scraps of sari silks ironed onto fusible interfacing, then machined all over with straight stitch in different directions to blend colours together and soften edges.
Small pattern shapes cut from metallic fabric and gold tissue paper, bonded on and machined over in metallic thread. The large pattern shape is cut from felt, machine applied to the main fabric, then covered in french knots worked in lurex threads. The pattern shape was then outlined in couched lurex thread.

closeup. Click on photo for larger image. Posted by Hello

Wednesday, June 15, 2005

I made my samples folder.


Here it is. Its just clear plastic A3 document sleeves tied together. The waxed version of the pattern is on the front cover and an unwaxed tissue paper version is on the back cover. Posted by Hello

This is the back cover. Bonded tissue paper accentuated with straight stitch on the sewing machine. Because there is no wax on it, the colours are much brighter. Posted by Hello

Wax lyrical (WIP carpet pattern)


waxed paper sample. Click on photo for bigger image. Posted by Hello

This is an interpretation of the carpet pattern. Its a layer of tissue paper ironed onto vilene interfacing. The shapes are tissue paper too, bonded with Bondaweb (wonder under) and then outlined or emphasised with straight stitch on the sewing machine.

Then the whole lot was rubbed over with an ordinary household candle, followed by some coloured glitter wax crayons and finally ironed under a sheet of silicone paper. Once the wax is heated, everything becomes translucent. The dotty effect you can see is the glue on the iron-on interfacing showing through!

I have decided to keep all my new carpet pattern samples etc. in a folder using this paper for the cover. Now I don't HAVE to do it any more, I've decided I don't mind keeping a FEW samples, just for inspiration and to remind me how I did things.

Transparent sample. Posted by Hello

This is a version of the waxed paper sample in transparent fabrics. I used a piece of sheer polyester curtain for the background and bonded on crystal organza shapes. The big white shapes are cut out of thin packaging material, I don't know what it is made of, but when I heated it with the iron while I was bonding it on, it puffed up a bit and made a really nice effect.

closeup of transparent sample. Click on photo for bigger image. Posted by Hello

green paper sample.Posted by Hello

I coloured some handmade paper with silk paints. Then I used some of the sheer curtain to cut out shapes and appliqued them to the paper using straight stitch on the sewing machine. Then I added some appliqued undyed paper shapes.

Monday, June 13, 2005

Designing from a source - carpets

During the City & Guilds course I did quite a lot of design work based on carpet patterns. I am still using material from the sketchbook I made during the course. I still hadn't finished with the carpets when it was time to move on to another subject and I have recently picked up where I left off. I found this happened all the way through the course, either I hadn't thoroughly explored a design source or I hadn't got all the mileage I could from a particular technique. It was very frustrating.

Here are some pages from the sketchbook.

Line drawings taken from carpet motifs. Posted by Hello